Diamond Tufted Ottoman. Whew!
I’m totally excited to share my latest with you all because it proves, once again, that you don’t have to be a professional to make beautiful things. And if I can do it, so can you!
Now, that’s not to say you won’t wake up the next morning with sore fingertips and stiff muscles, but, trust me, it’s worth it!
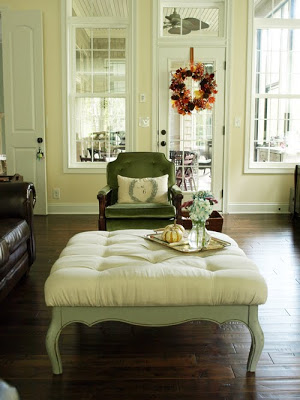
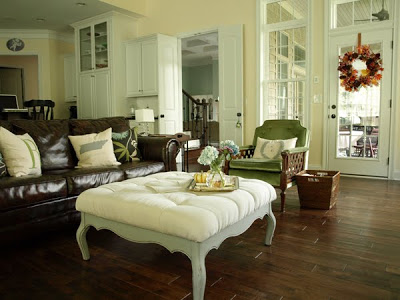
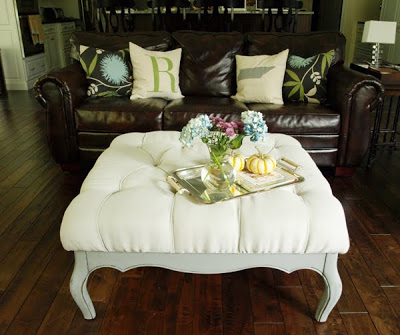
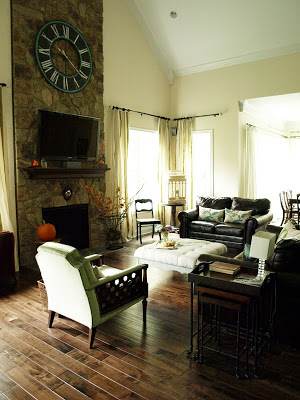
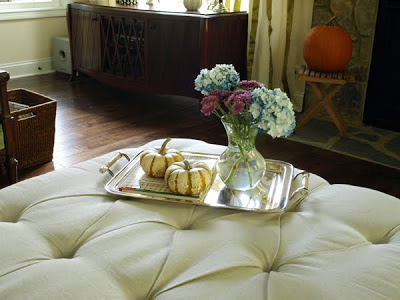
Here’s the finished product…
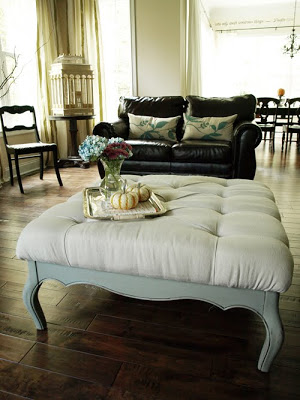
I’m loving it!
{insert big sigh}
I did a lot of research before starting this, and I’ll list some resources for you at the end of this post, but I’ll walk you through my steps as well. And there are a lot of them, so buckle your seat belt.
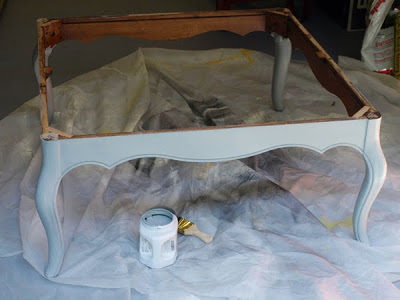
I started with this coffee table from Goodwill. It did have glass in it originally, but I knew this was going to be an ottoman, so I didn’t even bother bringing the glass home.
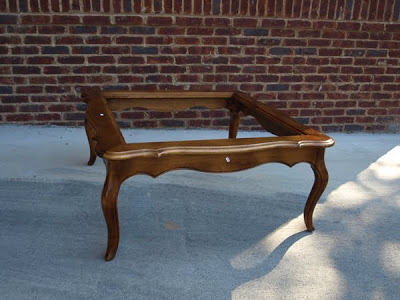
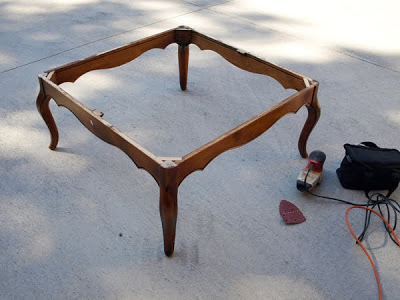
After removing the top and lightly sanding, it was ready for paint: one coat of Sherwin Williams’ Earl Grey and then a little glaze with a walnut stain like I did for this piece. Some light distressing with a sanding block finished off the base.
Now for the “tuft part” also known as the “tough part”. (Sorry-I couldn’t resist). I used a 4-inch dense foam cut to a 37-inch square. Click here for a great online source for the foam. It can be cut with an electric kitchen knife to the size you need! I used foam that was one inch larger than the size of board I would be attaching it to. You want your foam to be slightly larger so that it will wrap around the edges of the board a little bit and prevent the fabric from poking through later.
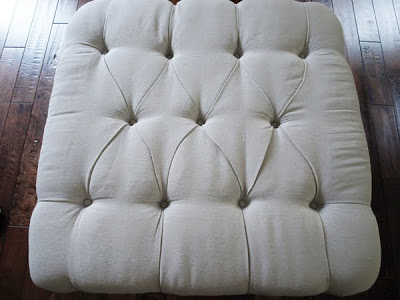
I used colored sewing pins to plan out where I wanted the buttons to go. It was super-easy this way to arrange and re-arrangeandget an idea of the pattern I wanted. I should add that I had originally planned to go with 23 buttons, but once I looked at it, I realized that, in this case, less was moreandended up with only 11. Of course that meant less work as well,andI’m all for that!
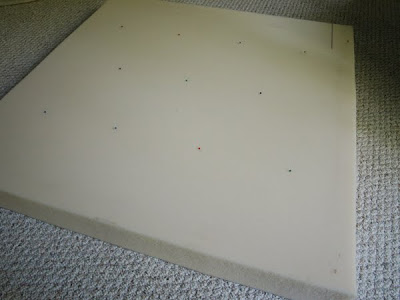
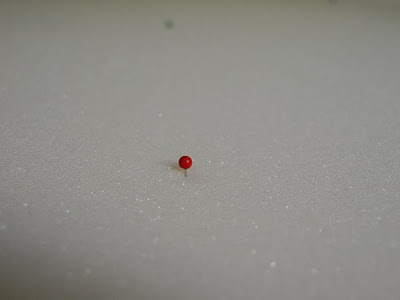
I marked the pins with a marker, then cut the holes. This is where I differed a little from other how-to’s I read about. Some people use a cylindrical cutting tool or scissors or a knife, but I decided to try drilling it, which worked out well for me. It was a little trickyandI would recommend trying it out on a test piece of foam if possible to get a feel for it, but I basically drilled in short burstsandjust let the bit rip grab onto the foamandrip it out. I also only went about halfway down the foam because my foam was so thick I didn’t want the button to go all the way to the bottomanddisappear.
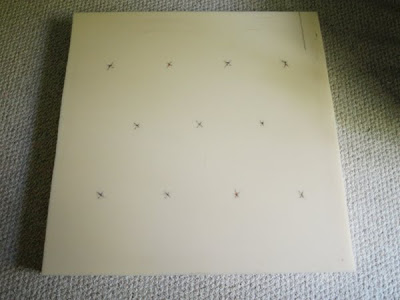
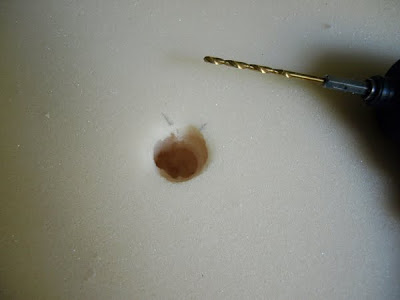
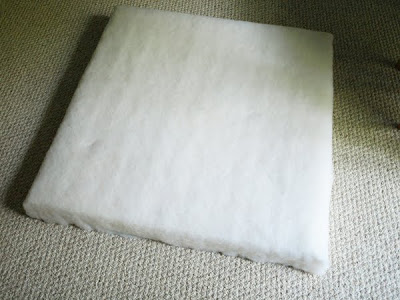
The drilling worked so well, it only took a few minutes to get all the holes cut. Then came the batting. I used 2 layers of 1-inch battingandglued it down with a little hot glue. Here’s the type of batting I used.
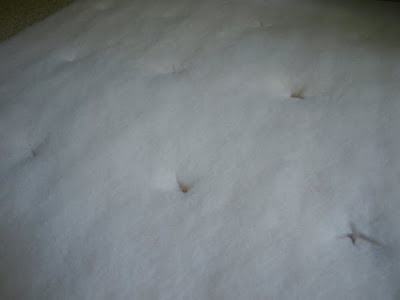
Then, I cut an “x” over each hole.
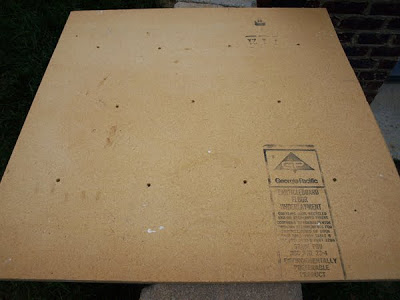
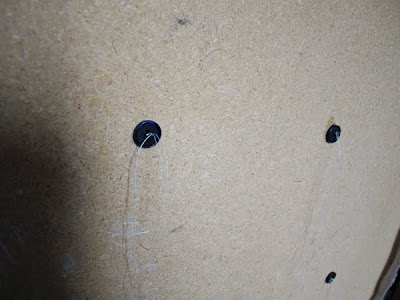
Next it was time to prepare the board. I used a 1-inch thick piece of particle board that we already had, but a piece of plywood would work as well. My husband marked the holes for me by hammering a long nail through each hole in the foam down to the board to mark for drilling. Then, he drilled through each mark.
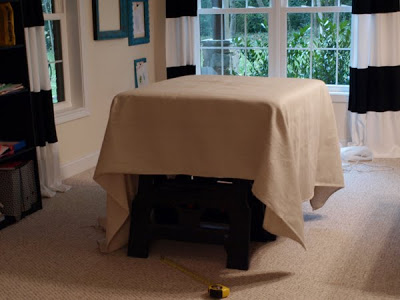
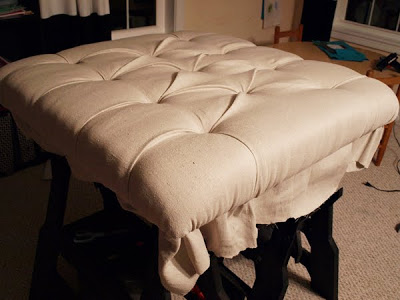
Finally, I was ready for the tufting. So I set up my board and foam across two saw horses so I could work underneath, and then covered the foam and board with my fabric. And if you read me often, you probably know what fabric I used for this: that’s right–another canvas drop cloth. I love them so much I couldn’t use anything else. And in this case, it really would be difficult to use something else because I needed a width of at least 72 inches to accommodate for the tufting and wrapping. I gave myself an extra 18 inches of fabric all around to make sure I had enough.
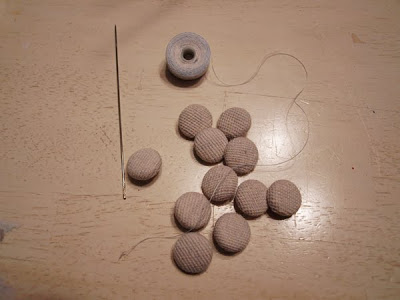
I covered my buttons with my fabric using thiscovered button kit,and had them ready to go along with the longest needle I could find and some strong nylon thread like this one here.
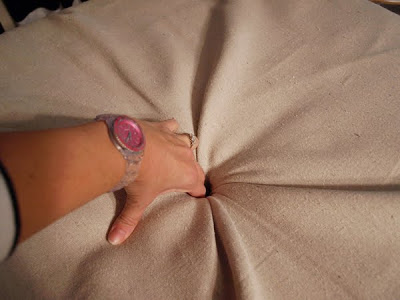
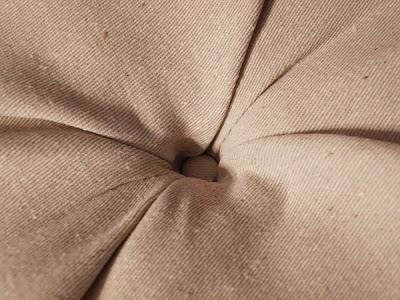
I started the tufting in the center and just pushed the fabric into the hole with my fingers. Then, I threaded a few long strands of the thread onto the needle, and poked the needle up from the bottom of the board. (Sorry I don’t have pics of this.) Then, I sewed thru the button and back down thru the bottom. Underneath, I pulled all the strands of thread thru a large button that I used as an anchor and tied them off really well.
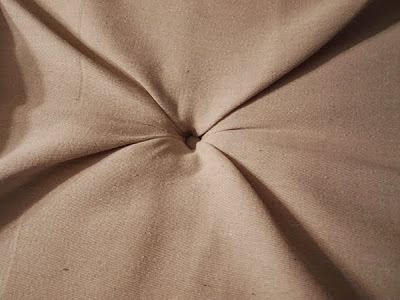
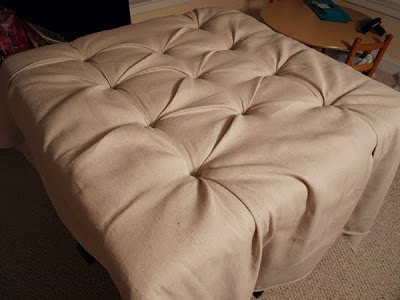
Then, I just repeated the process with every button, working from the center out, creating the folds for the diamond pattern as I went. This process isn’t as difficult as it may seem. It just takes a little working with the fabric to get it right.
Once that was all done, I wrapped the edges around, stapled it well, and cut off the excess fabric.
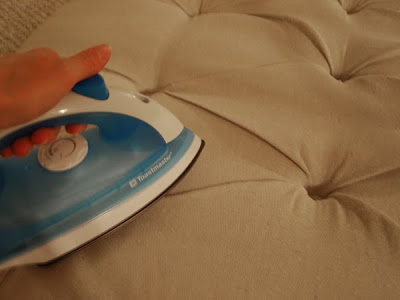
To get my pleats a little more defined and crisp, I ironed them down carefully and that made them just right.
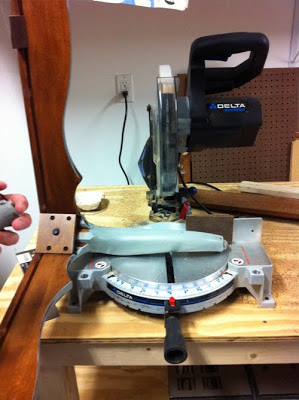
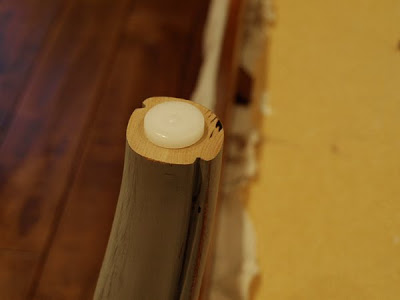
Then, I placed the top onto the base and it would’ve been done. Except for the fact that I had forgotten to take into account that the foam added onto the top of the base would make it too high for the sofa. I like a coffee table or ottoman to be just slightly lower than the height of the sofa. So, learn from my mistake and think about this first so you don’t have to do what we did and chop the legs off after the fact. And if you do have to chop, don’t forget to add these little furniture tacks on the bottom to protect your floor.
Once that was done, it was just right.
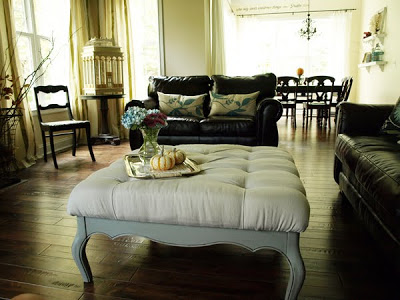
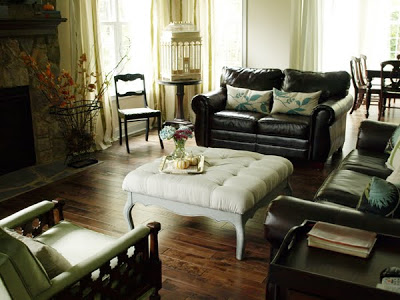
Did I get enough angles for ya?
I. love. it. Hope you do, too. If you have questions, I’ll try to help you out. And I hope you’re inspired to try this yourself!
Sharing this with some of these inspiring sites.
Here are a few more helpful resources for more info on diamond tufting:




October 13, 2011 @ 3:24 pm
Oh my gosh, this is beyond AMAZING!!!! So in love! It's perfect! Pinning this as a future diy. Thanks for sharing!
October 13, 2011 @ 3:35 pm
It's gorgeous! Well done!
October 13, 2011 @ 3:58 pm
That looks great!!! You did an amazing job and your tutorial is perfect!!! Could you do a king sized headboard now? I need the tut. for that!!
Great job!
October 13, 2011 @ 4:01 pm
Wow, wow, wow! That looks so fabulous, if I hadn't seen the tutorial I wouldn't believe that it didn't come from a high end store.
October 13, 2011 @ 4:18 pm
WOW! You did such an amazing job!
October 13, 2011 @ 4:43 pm
Oh my goodness, this is amazing! It is absolutely beautiful! I love how it turned out, and also the color you chose for the wood. 🙂
I hope you have a lovely day!
Blessings,
Jenni
October 13, 2011 @ 4:56 pm
OH my goodness, I have had this project on my mind for a while but the tuffting just seemed so difficult. Thanks for the tutorial. I am definitely going to revisit my idea. I love how yours turned out. It looks awesome!
October 13, 2011 @ 5:21 pm
OH WOW! julie that is AMAZING!
October 13, 2011 @ 5:39 pm
This is awesome!! I seriously love it! You did a great job on the tufting! Love the color your painted the base too!
October 13, 2011 @ 6:26 pm
This is awesome! You have such vision.
October 13, 2011 @ 7:06 pm
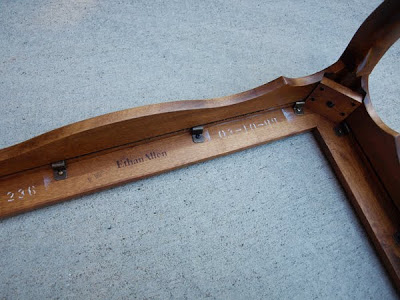
It's GORGEOUS! You make it seem so easy! dAnd it was an Ethan Allen piece- good score!
October 13, 2011 @ 7:17 pm
You did a fantastic job on this, Julie! It would cost several hundreds of dollars to buy one like this.
October 13, 2011 @ 7:22 pm
It is BEAUTIFUL !!!!! I'm definitely going to have to try this. Thanks for the step-by-step instructions.
October 13, 2011 @ 8:10 pm
Wow you did a fabulous job!!
October 13, 2011 @ 8:46 pm
So, so pretty!! I love it – very elegant and I'm a sucker for just about anything tufted. 🙂
October 13, 2011 @ 9:13 pm
I love it! I'm feeling a strong need to visit my local Goodwill. Thanks!
October 13, 2011 @ 11:06 pm
What a lovely job you made of that, and a great tutorial too. I don't even *need* an ottoman, but I'm tempted to give that a try!
October 14, 2011 @ 12:17 am
Wow. Wow. Wow!!! I'm speechless! Fantastic effort:) God bless x
October 14, 2011 @ 12:59 am
your newly tufted table is lovely!
what a fabulous job and
detailed tutorial you provided as well
thanks for sharing at fridays unfolded!
alison
October 14, 2011 @ 1:38 am
Thanks for all the tips on the tufting…I bet you were sore! Great job it looks really good!
October 14, 2011 @ 1:48 am
super clever!!!!
love it!
cheryl xox.
October 14, 2011 @ 2:01 am
Julie girl! You are amazing! I have a round table that I have been thinking about doing this with…and I only want to do one big hole in the middle. You make it look easy-although I know it's not (knot)..Maybe I will tackle that job this Fall after all! xo Diana
October 14, 2011 @ 2:09 am
Holy crap. Your house is beautiful… You are amazing & so inspirational! I love your ottoman you did such a great job!!!
xx Liz Marie
October 14, 2011 @ 2:24 am
This is soooo perfect! Seriously amazing. And your floors are gorgeous too! Love it!
October 14, 2011 @ 2:24 am
That is awesome! Great job, I have a coffee table and some foam I bought a while ago just waiting to be turned into an ottoman. Thanks for the step by step.
October 14, 2011 @ 2:45 am
Well done! I made one of these in my senior year of high school homemaking class! I love it and change the fabric on it as styles change. Very cool.
October 14, 2011 @ 3:05 am
fantastic!!
October 14, 2011 @ 3:20 am
This is by far the BEST "coffee table turned ottoman makeover" I've seen! 🙂 New Follower!!!
October 14, 2011 @ 6:44 am
awesome!!
October 14, 2011 @ 1:36 pm
Unbelievable!! This came out gorgeous- and the tufting is fantastic! I have tried to do tufting before- it can be difficult to get it to look good! You did an excellant job! Sharing this on FB- Thanks for sharing at FNF 🙂
October 14, 2011 @ 1:59 pm
I love this — I am pinning it!
Jenny
http://www.simcoestreet.blogspot.com
October 14, 2011 @ 2:18 pm
Beautiful! Very elegant. I just love anything tufted!
October 14, 2011 @ 2:21 pm
i love it too!
come visit anytime.
michele
October 14, 2011 @ 3:50 pm
amazing job!
October 14, 2011 @ 4:09 pm
Wow! This looks amazing! This tut is very easy to follow and understand. You did a wonderful job! Thanks for sharing! I am pinning this. 🙂
Stephanie @ Ladywiththeredrocker.wordpress.com
October 14, 2011 @ 7:04 pm
I love it! Very impressive. : )
~Tina
October 14, 2011 @ 7:56 pm
WOW!!!!It came out fabulous! Thank so much for sharing how to do it too. I am your newest follower. Don't want to miss a thing;)
~Debra xxx
Capers of the vintage vixens
October 14, 2011 @ 8:43 pm
Oh my gosh! So stinking cute! I LOVE it! Great job, not sure I will ever get up the courage to upholster something myself. Way to go!
October 15, 2011 @ 12:29 am
I LOVE it! I have been wanting an ottoman for our living room, so if you see your idea copied someday, don't be surprised. 🙂
October 15, 2011 @ 12:55 am
This looks amazing!!!
October 15, 2011 @ 1:14 am
Wow, wow, wow!!!! It is absolutley stunning!
October 15, 2011 @ 1:24 am
I always love meeting kindred spirits and sisters-in-Christ!!!
A friend sent me this link on facebook and challenged me to have a go. What a fantastic project, it looks amazing.
Angex
October 15, 2011 @ 2:31 am
It's so funny when I start thinking about doing a project that someone else in blogland completes it and gives me a full tutorial. This ended up looking amazing and thanks for all the steps!
October 15, 2011 @ 2:59 am
First off, the glimpses of your home…gorgeous!!!
And second, the project was brilliant!
Who would think one of those glass topped coffee tables could end up looking so amazing as a tufted ottoman, and add a tray and it's still a handy coffee table, well done!
October 15, 2011 @ 3:01 am
That is fantastic!
October 15, 2011 @ 3:04 am
SHUT THE FRONT DOOR! That is gorgeous!
Kerry at housetalkn.blogspot.com
October 15, 2011 @ 3:31 am
This is really pretty. Great idea and it turned out gorgeous!
Mary
October 15, 2011 @ 4:01 am
I have a big square wood coffee table that once had glass inserts, and I've wanted to do a similar project for a while now! Thanks for your great instructions!
-Revi
October 15, 2011 @ 10:03 am
There you have done a great job 🙂
and do not miss…..
S
A
T
U
R
D
A
Y
S
H
O
W
O
F
F
WELCOME 🙂
Håkan ( The Roseman)
October 15, 2011 @ 11:03 am
Wow this is amazing! You did such a wonderful job & I totally WANT it! 🙂 Wish I had a place for one I'd be going out to buy materials today!
October 15, 2011 @ 12:12 pm
This is beautiful! I have the same type of goodwill coffee table and I might have to think about doing something like this. Thanks for sharing all your steps!
October 15, 2011 @ 4:09 pm
This is absolutely perfect. I love it. Thanks for sharing this amazing tutorial. I will be looking for one of these tables.
I am having a giveaway on my blog. Hope you can stop by.
Ruth
October 15, 2011 @ 4:47 pm
This looks amazing! It makes me want to turn my coffee table into an ottoman!!
October 15, 2011 @ 7:28 pm
you never cease to amaze me..constantly looking at your beautiful things.in awe that you are my friend 🙂 LOL..wishing I had even the remotest hint of the craftiness it would take to tackle that project..but since i don't i live vicariously through you — hoping one day, that you will come and spend approximately one month with me and make me all kinds of fabulous things for my home 😉 you are awesome. 🙂
October 15, 2011 @ 9:52 pm
That was absolutely amazing. You did such a magnificent job. I can't shut my mouth at how beautiful that came up. Each tuft is perfect. Also, your house is gorgeous. Thanks soooo much for sharing your talent!
Paula
ivyandelephants.blogspot.com
October 15, 2011 @ 11:34 pm
I LOVEEEEEEEEEEE this I've seen a lot of this type of ottoman created, but yours sky rockets to the top of the list as my favorite! Well done my dear! 🙂
Pamela @ pbjstories.blogspot.com
October 16, 2011 @ 12:00 am
This is GORGEOUS! Thanks for sharing.
Sharon @ mrshinesclass.wordpress.com
October 16, 2011 @ 12:57 am
this is amazing! it looks sooo good!
hi from your newest follower!
xo dana
thewonderforest.com
October 16, 2011 @ 2:06 am
AWESOME!!!!
October 16, 2011 @ 3:14 am
LOVE LOVE LOVE it! It looks amazing… great job! I love your entire living room… the floors, the big windows, your paint color…. perfection 🙂
October 16, 2011 @ 7:41 am
Amazing! I will be pinning this and hope to use it in the future, thanks for sharing!
October 16, 2011 @ 7:56 pm
This is so gorgrous, and sucha fantasatictutorial! I would love it if you had tinme to link his up to my party befor it closes tonight @ midnight! Redoux.blogspot.com
October 17, 2011 @ 12:41 am
Oh, it looks fantastic!!! I love the canvas idea and your tutorial is so great I'm sure even I could attempt this! GREAT job!
October 17, 2011 @ 2:34 am
I love it. great job 🙂
October 17, 2011 @ 5:03 am
What?!?!?! i love that you made that out of a table. who would have 'thunk' it??? i don't just love your ottoman, but i LOVE your entire room!!!
October 17, 2011 @ 1:43 pm
That is stunning! Fabulously done.
October 17, 2011 @ 6:55 pm
Looooooooooooooooooooove this ottoman! Beautiful job!!! The tufting turned out spectacular.
Take care,
Christina
designingbynumbers.blogspot.com
October 17, 2011 @ 7:45 pm
This is a fabulous project!!!! It's so impressive – I love the color choice!
Erin from YAYDIY.com
October 18, 2011 @ 1:21 am
Gorgeous! Gorgeous! Gorgeous!
October 18, 2011 @ 2:33 am
This is so great!
October 18, 2011 @ 6:44 am
That is gorgeous, I love it!
October 18, 2011 @ 11:51 am
Wow this looks fab i love it. new follower here xxx
October 18, 2011 @ 1:16 pm
Seriously…this is so AMAZING! I love it!
October 19, 2011 @ 12:59 pm
You seriously rocked it with this makeover!! A coffee table???? Amazing.
If you would like I would love for you to stop over for my very first link party and chalk paint giveaway! I know my readers would just love it!
http://www.threeboys.net/2011/10/vintage-furniture-link-party-1-chalk.html
October 20, 2011 @ 1:58 am
Love it! Please post this, and anything else you may have,in my link party at
http://diycraftstomake.blogspot.com/
Thanks,
Peggy
October 20, 2011 @ 5:34 pm
Ahhhhmazing work! It's to die for! I have featured this at my VIP party this weekend. Please stop by and grab a button =) Xoxo!
October 20, 2011 @ 7:13 pm
i love what you did with this project so much
that i decided to feature it
on this week's edition of
fridays unfolded!
alison
October 20, 2011 @ 8:01 pm
holy smackers! Button me up and call me a cab, cuz that spectacular and I wish I'd a thunk it up first!
October 20, 2011 @ 11:13 pm
Ah, heck I featured you, too. 🙂 Great job!
October 21, 2011 @ 12:52 am
I am so loving this! This is exactly what I have been wanting to do – just need to find the right table! Yours is fantastic!
Kathy
October 21, 2011 @ 1:42 am
That is seriously A-MA-ZING!! I just absolutely love it and I'm beyond impressed with this project. It looks gorgeous! I saw it featured over at Stuff and Nonsense and had to come and take a look at it in more detail. Well done!
Vanessa
October 21, 2011 @ 12:45 pm
I love this! What a fantastic DIY transformation! I'm featuring this on my site today! I hope you'll stop by!
Jen
Scissors & Spatulas
October 21, 2011 @ 5:08 pm
Awesome instructions! Thank you for all the detailed picts. too! It came out bad a$$!
Great Job =)
October 22, 2011 @ 5:39 am
So pretty! I would love for you to link this up at Do Something Crafty Friday: http://vanessascraftynest.blogspot.com/2011/10/do-something-crafty-10.html
October 22, 2011 @ 1:36 pm
So fabby~!
October 22, 2011 @ 6:57 pm
Unbelievable job on this. You inspired me to try it myself
October 23, 2011 @ 4:23 pm
Julie – that is beautiful – I have a coffee table just begging for this treatment – thanks for the "how-to's"!
Peggy
October 27, 2011 @ 8:06 pm
Wonderful job! I am so impressed and love the idea! Thank you for taking step-by-step pictures!
November 1, 2011 @ 2:39 am
Julie you out did yourself! The tutorial was great as well. I love how it looks. The height looks great. Love it!
November 8, 2011 @ 2:25 am
Love the ottoman!!! Great job 🙂
I just found your blog today… so I joined. I too am a DIY'r and recently started a blog… come check it out if you have a chance…
Blessings, Diana
http://www.AnyoneCanDecorate.blogspot.com
November 8, 2011 @ 2:55 am
Oh my goodness that pattern is just awesome! You make it look so easy that I have to try it at a later date!
November 9, 2011 @ 2:23 pm
Wow, love it! It's really beautiful 🙂 The pleats can't have been easy! But I'd still love to try it someday!
November 9, 2011 @ 2:41 pm
SOOO much work, but it looks amazing. I have to go back and ogle it some more.
November 13, 2011 @ 5:25 am
This is sooo gorgeous! Thank you for sharing how you made it! I am keeping my eyes peeled for a table with similar legs so I can make one for my living room. I'm totally pinning this!
January 26, 2012 @ 8:19 pm
Hi! GREAT project!! You did a fantastic job on it! Infact, my husband and I are so inspired we already went out and bought a table to start this ourselves! We've been searching for reasonably priced foam and have had a hard time finding it! Where did you get yours and do you mind me asking for how much?? Thanks for the help!!
January 26, 2012 @ 8:32 pm
So glad you've decided to try it! I buy my foam at a foam outlet in my area. I would google "foam rubber" or "upholstery supplies" in your area to find it. Mine cost around $30 from what I can remember. Feel free to email me if you have further questions!
January 27, 2012 @ 5:18 pm
Love this & can't wait to try it!! Did you attach the top to the base (with legs) last after the top was complete? How did you attach it after it had already been upholstered? Thanks!
January 27, 2012 @ 6:33 pm
Yes, the top is attached at the end by screwing it on from the bottom up. In our case, there were small brackets that had held the original top to the base, so we just re-used them. You can buy small brackets from any hardware store if they don't come with the table.
January 28, 2012 @ 3:34 am
where did you get the foam from? I am finding it mighty expensive…and some not even wider than 24". please let me know! i am so excited to get this done!!
January 28, 2012 @ 2:30 pm
See my reply above to OliviaJanae about where I got mine. Good luck on your search!
February 3, 2012 @ 3:03 pm
Love this! I want to make one and I think I found a table that will work… It's the same size as yours but the edges are more rounded and have a carved detail. Do you think the foam would go around the edge weird, or will it be fluffy enough to balance out?
February 3, 2012 @ 3:13 pm
I'm not sure. I removed the original top from mine & used a piece of board which just had a straight edge. I think it would depend on HOW rounded & carved it is. If it's only slightly, it may work.
February 17, 2012 @ 9:29 pm
Wow a fantastic job you have done there! I'm mesmerized!
February 25, 2012 @ 4:19 am
a lot of people do these but i have not seen one as good as yours!
May 31, 2012 @ 10:19 pm
Found this on Pinterest and pinned it months ago. I JUST finished my ottoman and post and linked back to my inspiration. I have some great pictures over at: http://www.twentysomethingtransue.blogspot.com/2012/05/how-to-make-upholstered-tufted-ottoman.html. Thanks!
June 22, 2012 @ 8:39 am
Awesome ottoman! Thanks so much for the great tut. I just happen to have a table similar in size to yours. I bought it for the glass top so to make an outdoor table for my patio. Now I know what to do with the rest of it. Love it!!
June 26, 2012 @ 4:46 pm
I love your ottoman!!!!!!!! one of the best ones i've seen…quick question…though..how did you attach the particle board after it was tufted to the goodwill coffee table itself? Thanks!
June 27, 2012 @ 12:27 pm
I used L brackets that had held the original top in place. If your table is not attached that way, you might try buying some small ones at a hardware store.
July 13, 2012 @ 12:44 am
Julie I love this ottoman and just about every thing you post for crying out loud!
I am now ready to make this ottoman, I'm also using drop cloth, (because it's awesome, and I couldn't find anything else that matched our sofa that I liked) so i have a question for you regarding the fabric? Did you put a scotch guard on it or anything? How has it kept up to dirty feet? : ) : )
Thank you!
August 7, 2012 @ 5:21 am
Loved this! Been wanting to do this with some furniture but did not know if it was possible. Thanks so much !
December 6, 2012 @ 3:47 pm
Thanks for blog 🙂
March 5, 2014 @ 4:51 am
Holy cow, I am totally in love with your ottoman! You did such a fantastic job. Off to Craigslist to find a gem. 😉
November 25, 2014 @ 3:10 am
Your ottoman is simply gorgeous! Thank you so much for sharing! I have been searching for an ottoman forever but don't want to pay an arm and a leg. I absolutely love this idea and want to go for it How much fabric did you use? I have found the fabric I want online, but I have no idea how much to order. I want to make sure I have plenty but don't want to go crazy. I am looking to find a table similar to the size of yours. Thanks in advance!!
November 25, 2014 @ 3:21 am
Ugh! That's a hard question, especially without having exact measurements of the table you'll use. However, I would be careful if you use a 36" table like I did because most decor fabrics come in 54" width which may not be quite enough to compensate for the depth of the foam and the tufting. I wish a had a more definite answer for you! I would suggest making approx a 6 inch allowance for each "tuft", plus the depth of foam and a couple inches for wrapping under.
November 25, 2014 @ 5:27 pm
The fabric I am looking at ordering is 54 inches, and you order it by the yard. What was the approx. depth of your foam?
February 5, 2015 @ 11:30 pm
How does the top attach to the bottom? I am missing that part of how this works. I love what you did and have a nearly identical table that will be converted as soon as I find fabric I love and have a free weekend!
February 5, 2015 @ 11:44 pm
We just screwed the top back on with the same screws we had taken off of the original top 🙂