How To Do a German Smear Mortar Wash on Brick (Dave and Brittany’s Fixer Upper!)
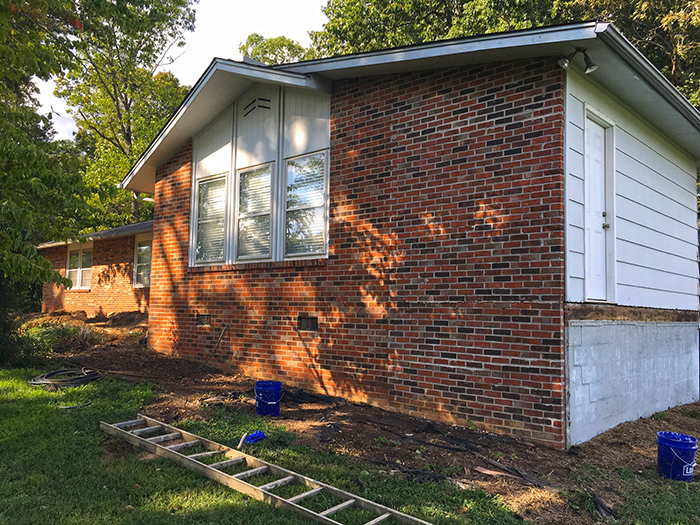
Who doesn’t remember the Fixer Upper episode where Chip and Joanna wowed us all with their transformation of a 70’s brick house into a gorgeous Old World retreat with a little technique called a German Smear? It soon became a household term amongst Fixer Upper fans everywhere and inspired hundreds of DIY-ers to re-think their basic brick.

(photo via Magnolia)
One of those people was my brother, David: DIY-er Extraordinaire and a regular here on the blog now, known for his own Fixer-Upper projects you may have seen here and on my social media. (Remember this kitchen reno and this farmhouse table?) Well, he did some experimenting and research and recently took the plunge to do a mortar wash on their brick exterior. And it turned out to be fabulous! It’s a lot easier than you may think. And the amazing part? His total cost was less than $25! (Yes, really!)

(This post contains affiliate links which help to support this blog. Read more on that here.)
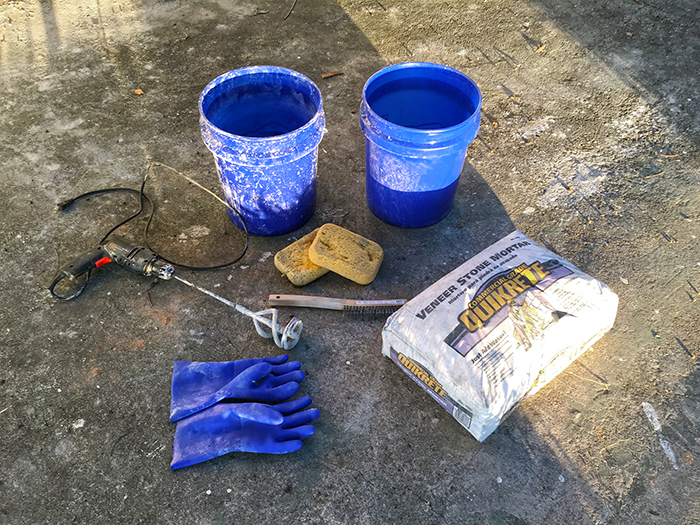
The supplies needed are basic, many of which you may already have in your garage or tool shed, but links are provided for items you may want to order…
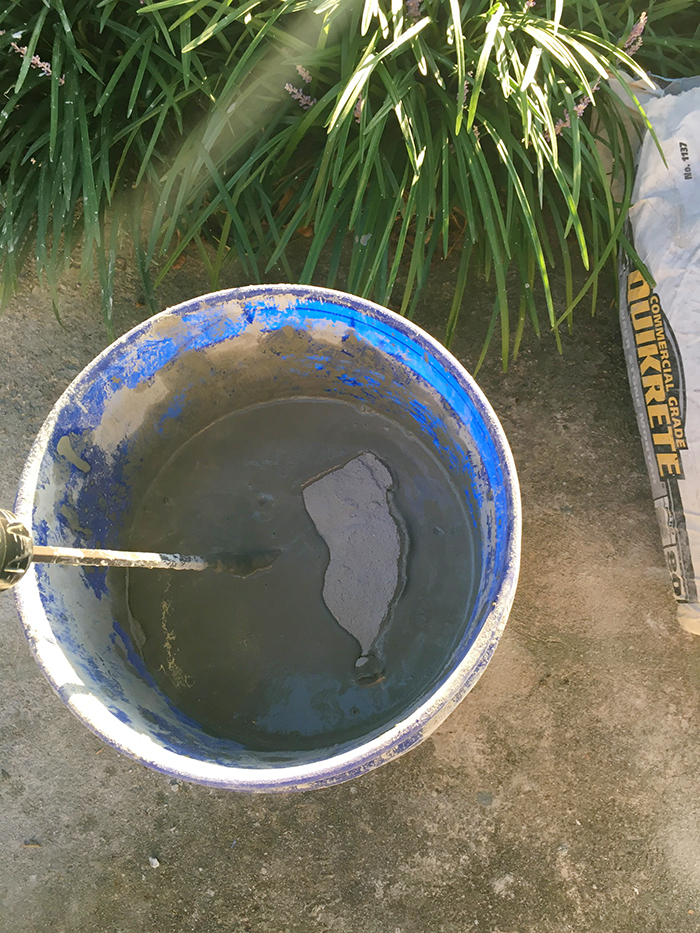
- Two 5-gallon buckets
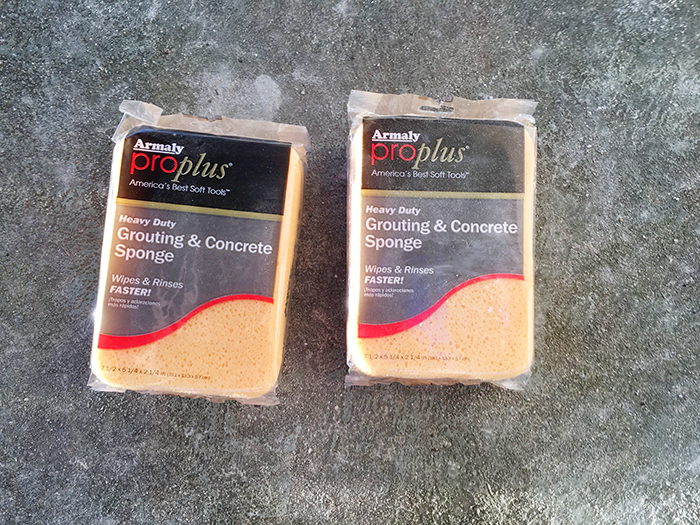
- Two grouting and concrete sponges
- A concrete mixer to use with an electric drill
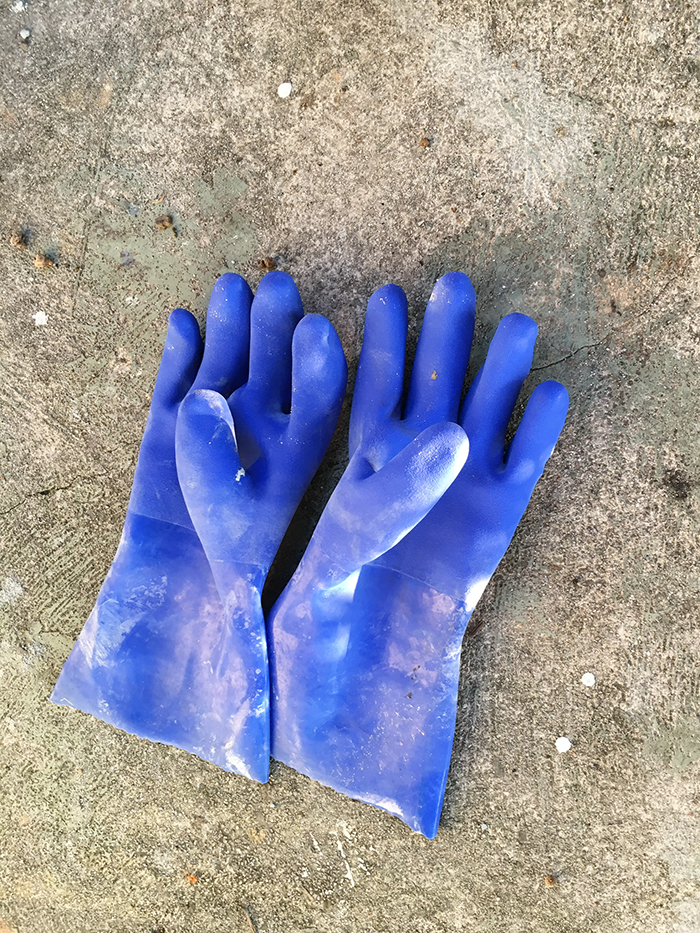
- a pair of heavy-duty rubber gloves
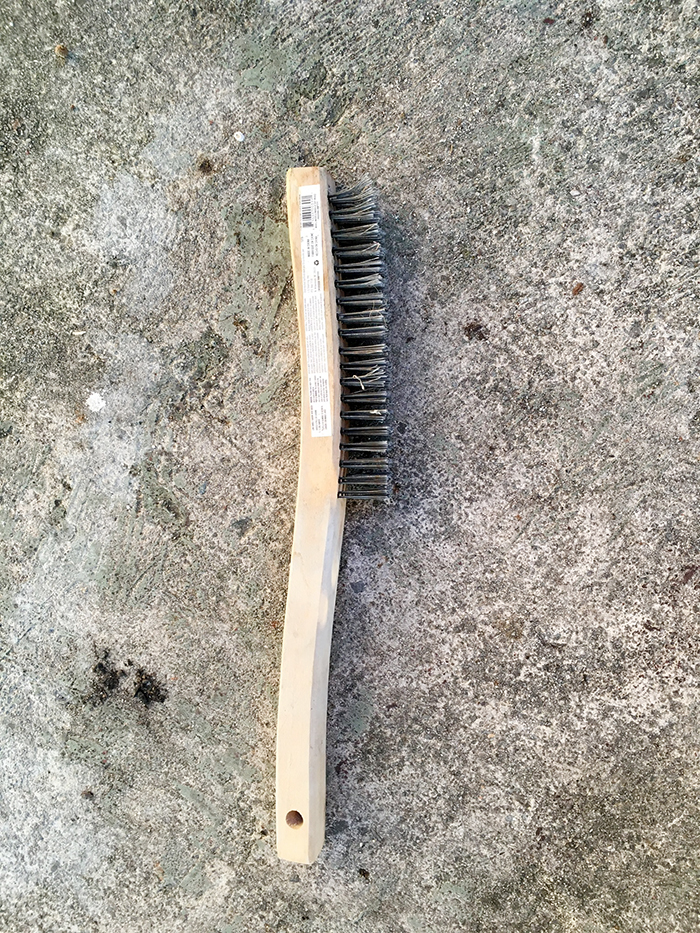
- a wire brush
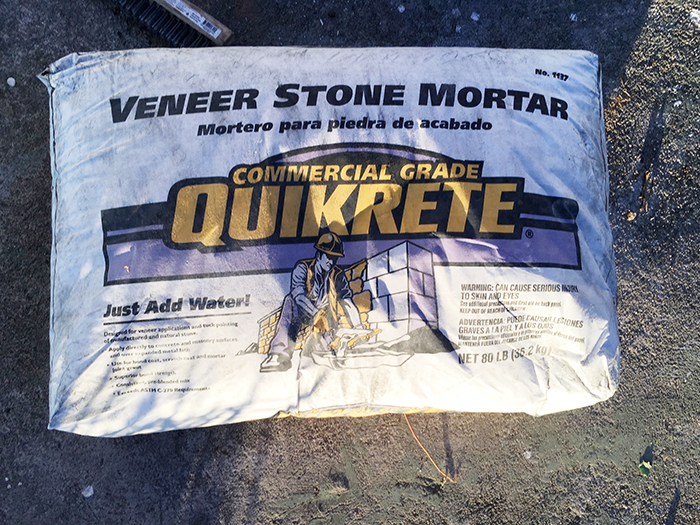
- 80-pound bags of mortar mix
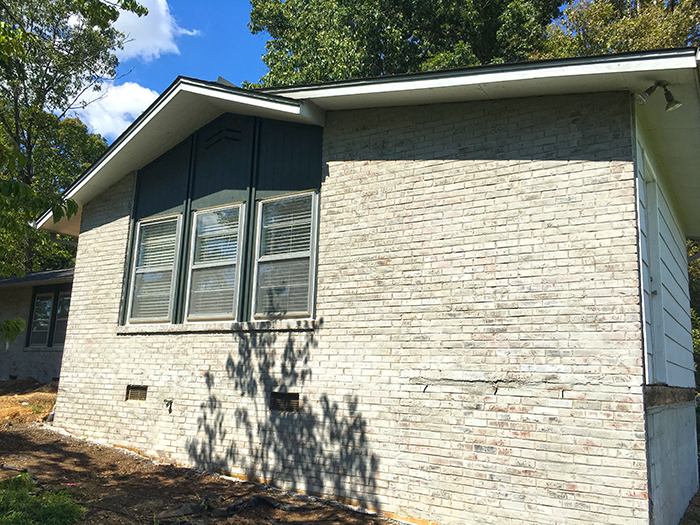
David went with Quikrete’s Veneer Stone Mortar because it was just the shade of warm gray he and Brittany were wanting. It’s only around $7 per bag at Home Depot. Whiter shades of mortar can be used for a whiter look, or dye packs can be added to white mortar for custom colors. The color of the dry mix will be the color of the finished look. Don’t be alarmed when it looks darker during the process while it’s wet. It will dry to a lighter shade.
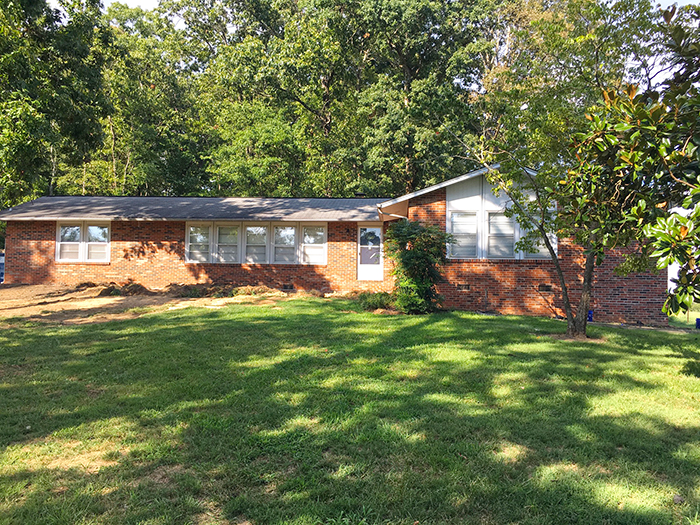
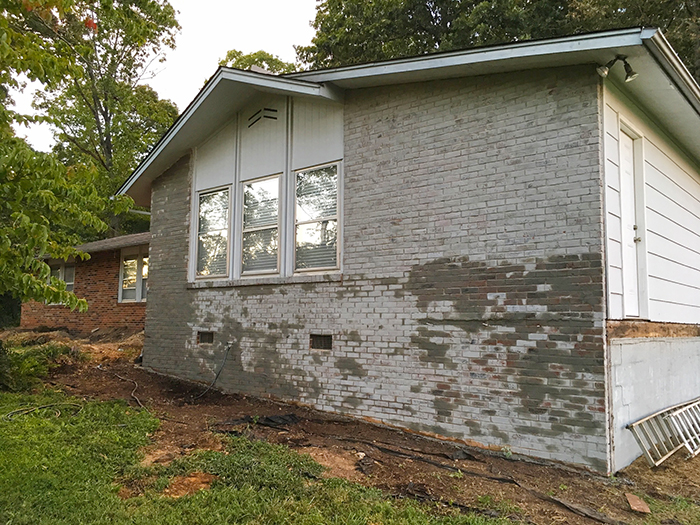
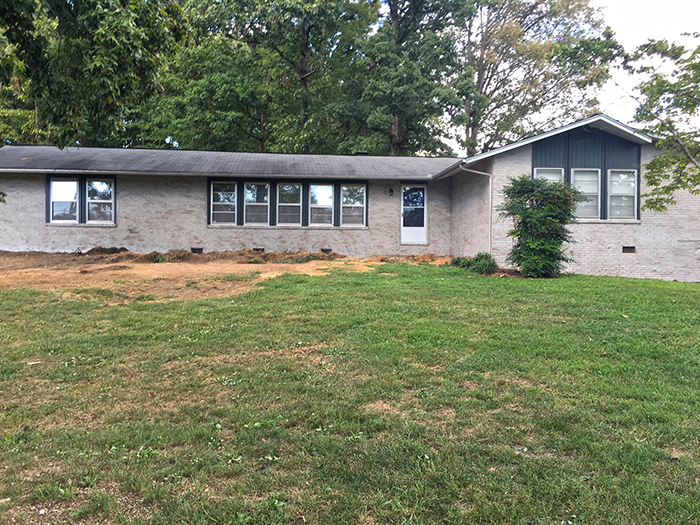
Their house has a brick front, which is about 900 square feet of brick that they wanted to cover. It took just under 3 bags to do the whole front, and since David already had the tools needed, it ended up costing them less than $25! It only took David around 4 1/2 hours to do the whole job himself and there’s little-to-no prep work to do beforehand!
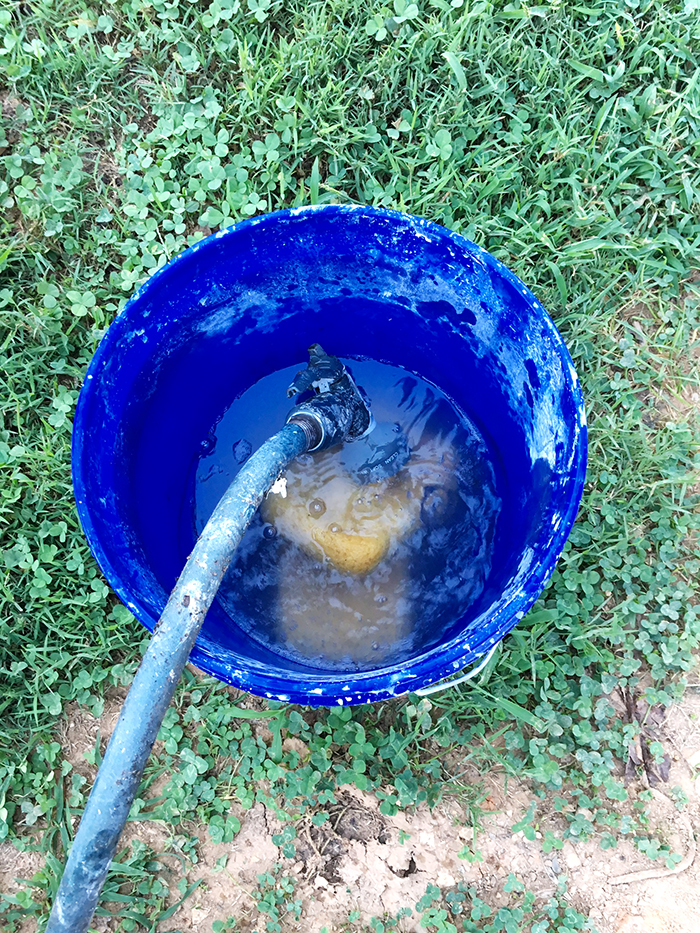
To start the process, you need one bucket of clean water, as well as a hose nearby.
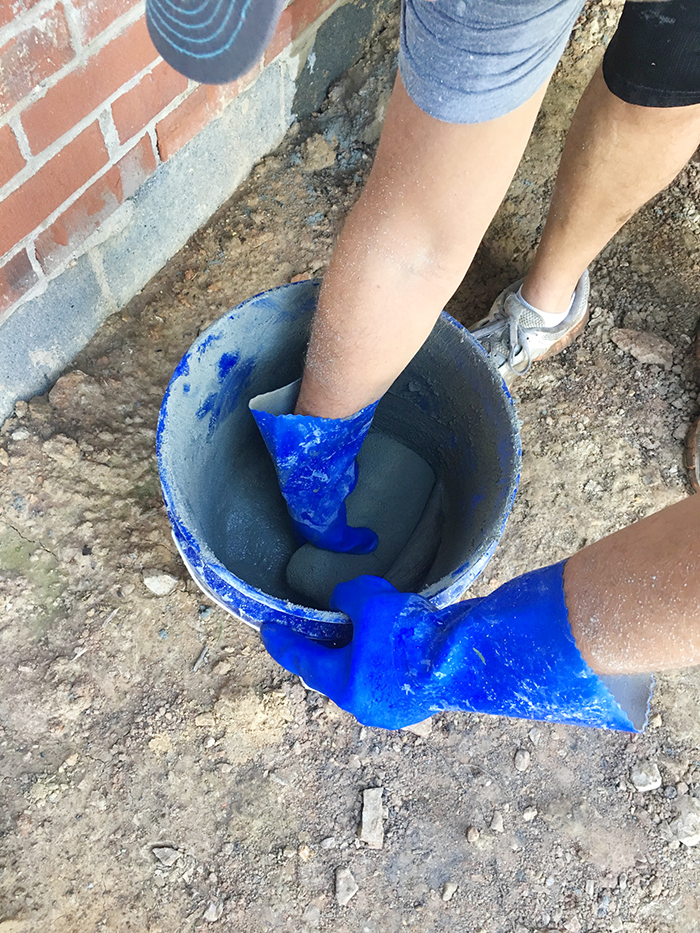
In the other bucket, mix the mortar about 1/4 of the bag at a time at about a 70/30 ratio of mortar to water (70% mortar, 30% water). Use the concrete mixer drill adapter to get it mixed well. You want the mix to be about the same consistency as pancake batter.
Things will get a little messy during application, but the rubber gloves will help to keep the mortar off your skin.
These sponges are made for working with these materials, so they are perfect for applying the mortar wash.
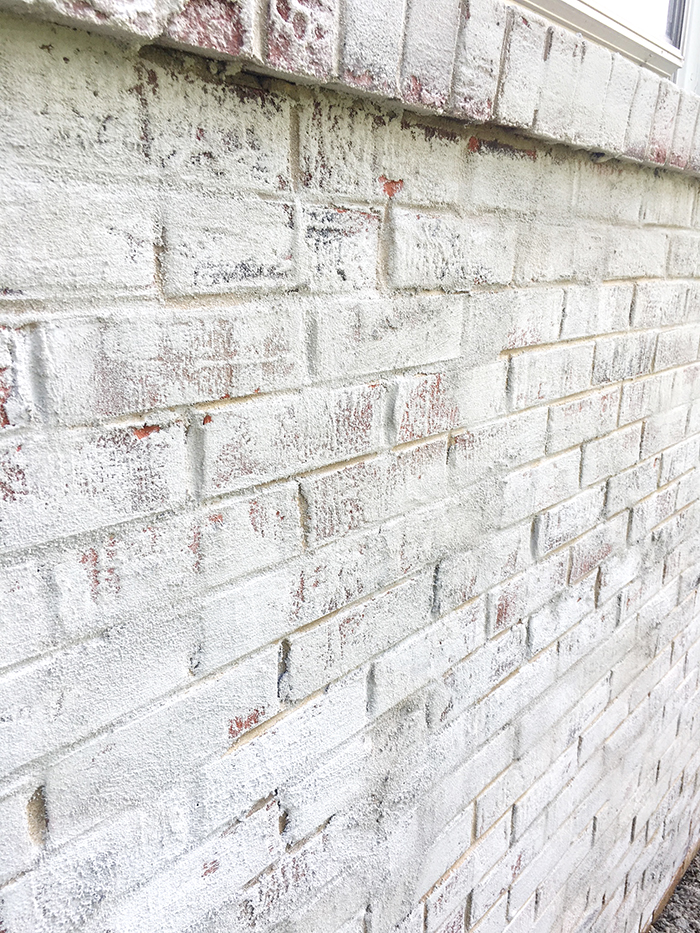
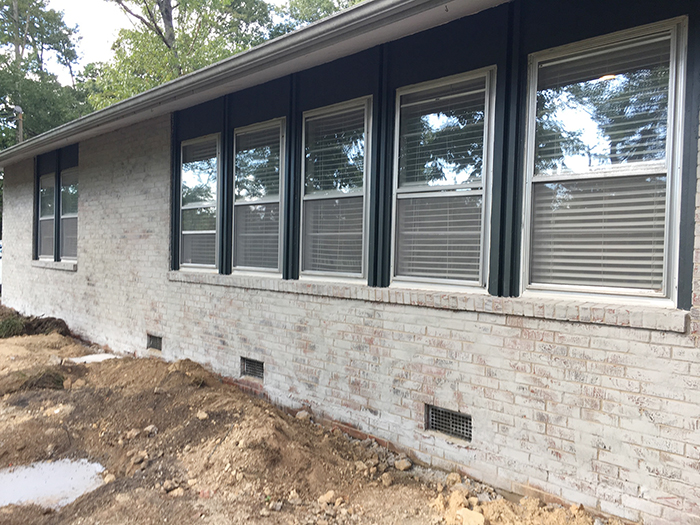
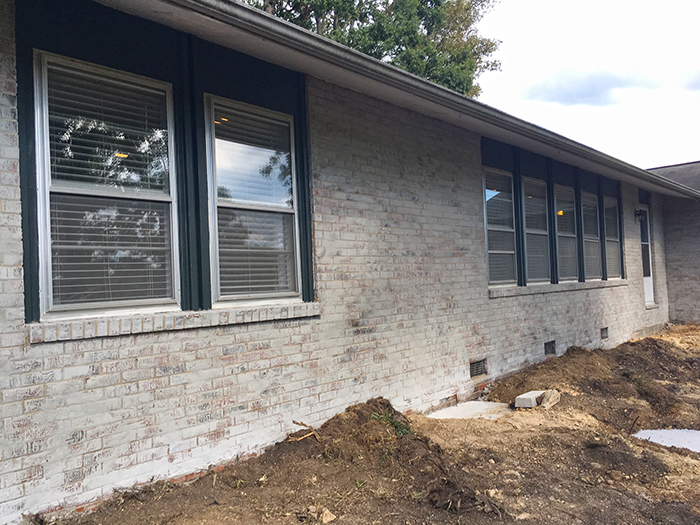
Once all the supplies are ready, the first thing to do is hose down the portion of the wall where you’re ready to apply the mortar. David recommends covering about a 5-square-foot section at a time, working from top to bottom. When the brick is nice and damp, it’s time to apply the mortar mix.
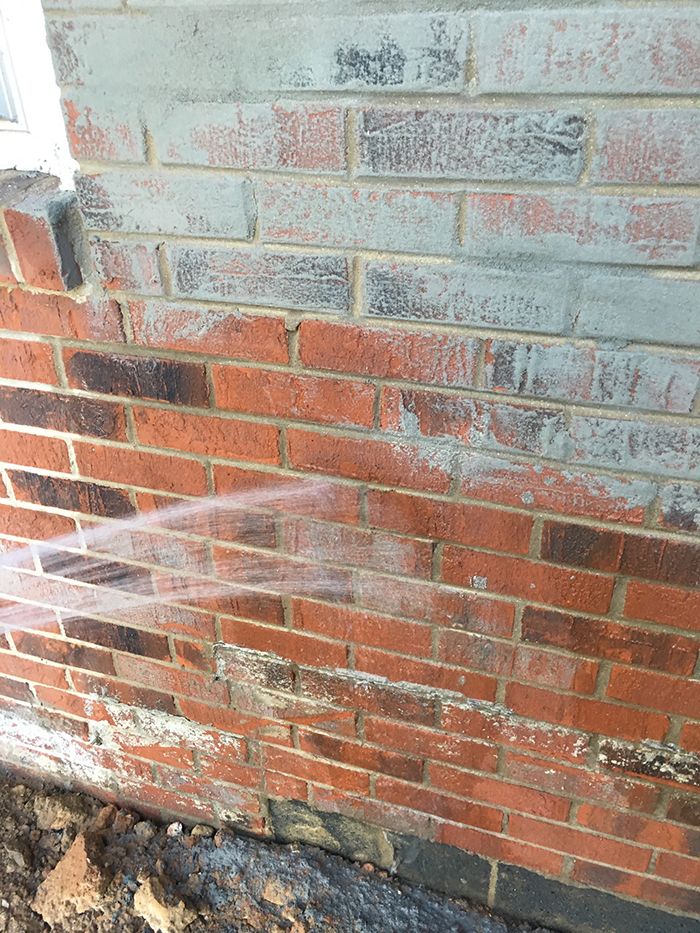
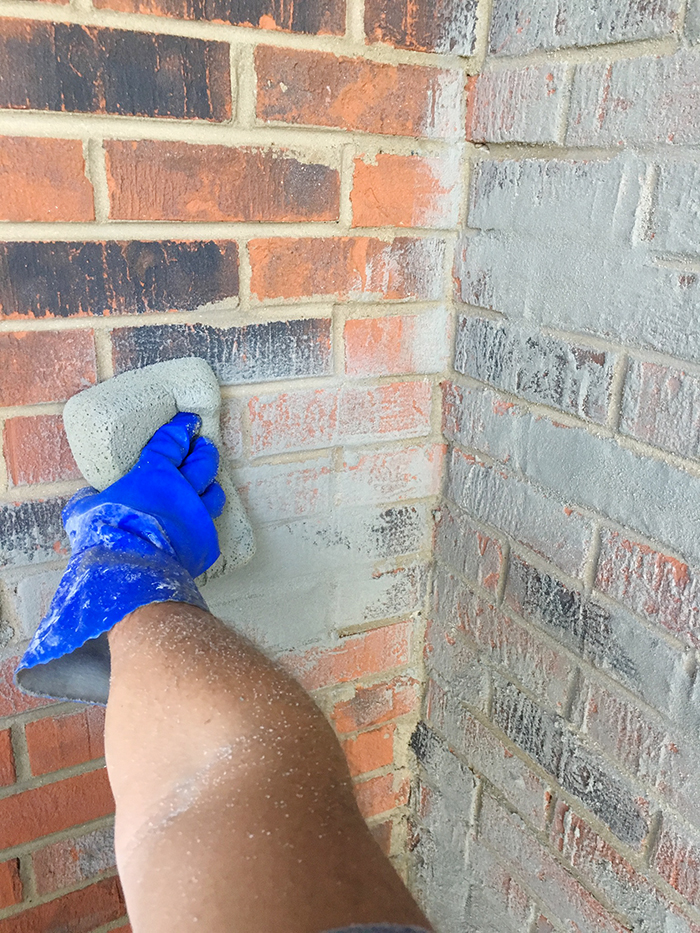
The difference between a mortar wash and a German Smear is in the application. The mortar wash, like David and Brittany chose, is basically a thinner, more consistent layer of the mortar, applied in lesser amounts, with various bricks left with sparser coverage. With the mortar wash, there may be less clumps and chunks left on and the coverage is a little smoother. With the German Smear, the coverage is heavier, with less definition between the bricks and more of a rustic look, with a few bricks wiped off to expose original brick. The mortar is mixed the same for either technique, it just depends on the look you prefer. If you apply more than you want, you can wipe it or rinse it off for the first few minutes until the mortar starts to set. Or, you can use the wire brush to remove larger portions…
Dip the sponge into the mix and scoop it on, applying it to the brick in an upward motion.
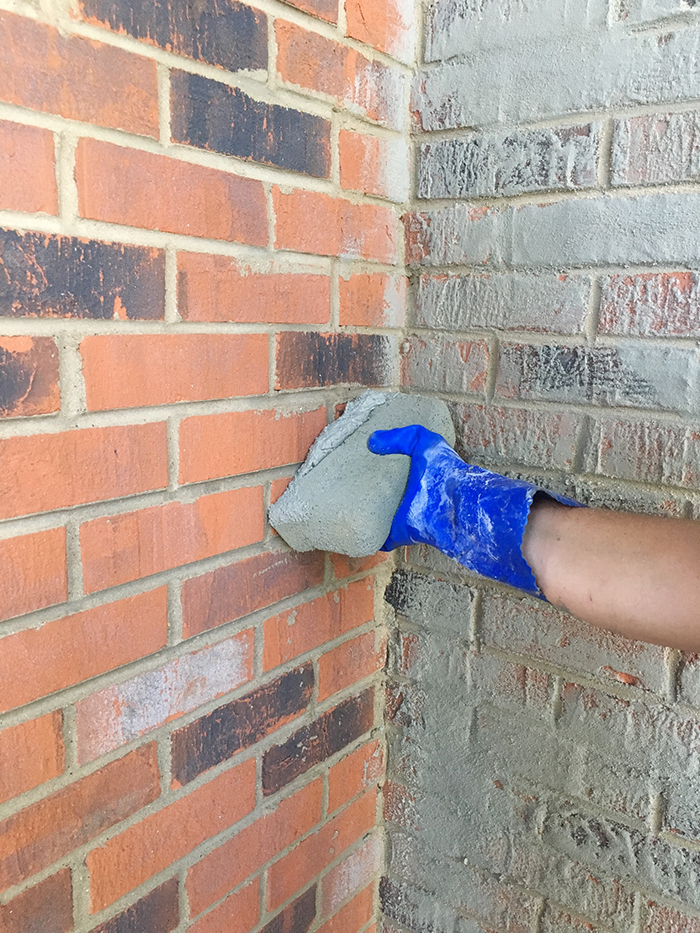
Then, just rub the sponge over to get the coverage you prefer.
Here’s a quick video of David showing the technique…
Rinse your sponge in your water bucket every 5-10 minutes, wringing it out well. Then change out the water in your bucket when it becomes too dirty.
The mortar will start to set within 20 minutes or so, and it will dry to the color in 3 to 4 hours on a warm day. Manufacturer’s instructions say it is fully cured in 3 to 4 days.
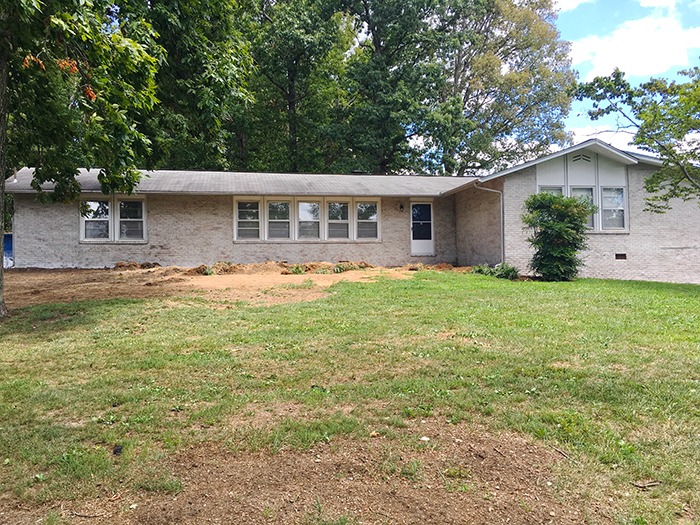
It’s such a huge transformation for such a small investment! And just so you know, this is permanent. But the good news is, no need to re-paint in a few years!
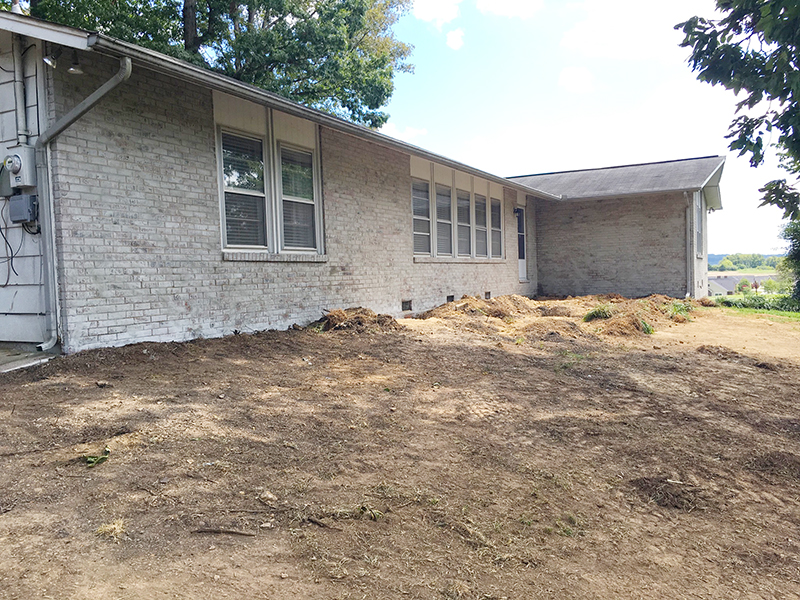
After the mortar wash, their next step was painting the trim around the windows in Sherwin Williams’ Rock Bottom…
Love it!
The next steps are going to be the new front door, new shutters, new siding, a new roof, and new front and back porches! I’ve already seen some of this progress and I can’t wait to share it with you later! Stay tuned!
Thinking about trying a mortar wash or German Smear? I hope this how-to helps with the process! And to see some of the work David and Brittany have done on the inside, check out these posts…
Kitchen, Dining and Family Room Makeover


September 10, 2016 @ 6:37 am
I love the work done here. I have painted brick and have wanted to do this process; do you know if it is possible to mix paint and mortar and do the German spreading process? I want to make a much more stuccoed appearance on my 1953 ranch house which we have been renovating into a modern home.
September 10, 2016 @ 6:34 pm
I would not recommend mixing the paint and mortar. They do make dye for certain types of mortar, so I would go that route if you want a custom color. You can use this same technique and apply it in a thicker manner to get the look you’re going for! Good luck with your project!
September 14, 2016 @ 12:21 pm
Can you do this over painted brick?
September 14, 2016 @ 1:33 pm
Great question! We have not tested that ourselves yet. If I were you, I would probably test it in an inconspicuous area first, let it cure well for a few days, and then try scraping it off. If it comes off, then it won’t work. It depends on how well the paint is currently adhering to your brick. I hope that helps you!
August 17, 2017 @ 11:25 pm
Yes. Just did it to my son’s fireplace. Was a nasty yellow brick, painted them reds with black then the next day did the smear. Turned out awesome!!!!
September 27, 2016 @ 9:02 pm
I am curious how this holds up over time. How is it looking? I live in Ohio and worry about the heat and cold…
September 28, 2016 @ 1:40 pm
Well, this is holding up wonderfully so far but it’s only been up for couple months. However, because this veneer mortar is made for stone & meant to stand the test of time, I’m sure it can weather all kinds of weather! Hope that assures you!
July 1, 2019 @ 2:06 pm
I’m curious, almost 3 years later, how is it holding up? We are in the middle, well testing stage, on our house. And it seems to just wash off with the garden hose, even after over 24 hours of cure time.
July 3, 2019 @ 8:25 am
Theirs is still holding up perfectly, just like when they first did it! We are puzzled as to why yours is washing off. If you are doing the same products & technique, it should be staying on. I wish I had an answer for you!
October 28, 2016 @ 3:11 pm
What did you do for the siding that is on the house?
October 28, 2016 @ 3:29 pm
New vinyl siding!
November 8, 2016 @ 10:48 am
Thank you for this great how-to. I have a painted brick backsplash that I’d like to use a German Smear on. Do you have any idea whether there’s a primer I need to put on, that would be a better surface for the mortar to adhere to?
November 11, 2016 @ 9:28 am
So sorry for the delay in getting back to you! I wanted to ask my brother what he thought. Here is his response :
Painted makes it tricky. I don’t think she’ll need a primer. That won’t do anything. It could work but then again it may peel after a while. The thing is mortar will draw every bit of moisture out of there so it just makes me concerned that it may cause that paint to flake
I wish it could say it would work, but he’s not sure about that!
November 23, 2016 @ 4:43 am
Would the mortar transfer to your clothing or skin if you brushed the brick walking by? I’d like to use this technique inside my home but worry about getting it on my clothes or my guests getting it on their clothes.
November 23, 2016 @ 11:53 am
You would want to definitely avoid letting the wet mortar mix come in contact with your clothes. But after it has dried and cured, just brush it off well and vacuum over it, and it should be totally fine after that!
December 31, 2016 @ 5:40 pm
Thank you for your great information. I’m doing German schmear on my brick fireplace then adding a sliding barn door fireplace screen. Your info was a great help
January 23, 2017 @ 11:33 am
Sounds great! I’d love to see a photo of your finished project!
January 23, 2017 @ 10:54 am
Just shmeared fireplace and 12 hours later it still rubs off. Should I apply a sealer or some sort?
January 23, 2017 @ 11:33 am
We recommend giving it a few more days to fully cure, and then reassessing the situation at that time. If it’s still rubbing off at that time, you probably want to seal it. We have only had experience with this technique on the outdoors so far, so I’m not sure which sealer to recommend. We’d love an update on your project in case others have the same questions! Good luck!
April 12, 2017 @ 10:28 am
The bricks on a fireplace should be sealed to minimize staining. You can sandblast to take the sealer (or paint) off. You need raw brick or stone for proper adhesion.
April 13, 2017 @ 6:39 am
Thanks for the tip!
February 1, 2017 @ 9:54 pm
To the person interested in the German Shmear on painted brick, the typical mortar mix will not adhere well to the paint and primer will not help much. The brick needs to be porous, so sealed brick, painted brick or even brick covered in soot like on a fireplace are not good candidates for a mortar coating. I have not done this, but it is very common in construction to float a coat of polymer modified cement or thinset onto brick or tile and it will adhere. It dries much faster than mortar does, but it sticks to everything that it dries onto. Good luck.
February 6, 2017 @ 3:31 pm
Hello, I wanted to know what would happen to the finished brick on the German Smear morter if it rains?
Would you suggest a sealer or maybe adding paint to the formula, trying to go for the same look as the house Johanna did on hgtv.
I was also like to know how you would achieve the thicker grout look.
Thank you
February 6, 2017 @ 7:58 pm
The mortar sets pretty quickly, so unless there is heavy rain soon after you do it, there should be no effect. If you’re looking for the heavier German Smear look like Joanna Gaines, you will use the same technique, but apply the mortar more heavily, leaving some bricks more exposed and others thickly covered. It’s a technique that’s unique to your individual preference & will come with a little practice. I would suggest you start in an inconspicuous area to test it & get the coverage you’re wanting!
March 18, 2017 @ 5:06 pm
How long does the smear last? Do you need a sealer on outside use? Does it change color.
Wear away., we live in midwest
March 19, 2017 @ 1:33 pm
The smear will last for the long haul just like mortar on brick. You can expect the same results from it as you would your mortar on your existing brick now. It does not need a sealer. Hope that helps you!
March 24, 2017 @ 7:08 pm
I’m determined to do the German Smear on my brick exterior but I haven’t been able to find white mortar mix, so it really is as difficult to find as everyone says. The fixer upper house on HGTV looks like a cream color and not white but I cannot find any instructions on what they used. I know that I don’t want to go with gray, so can you help me in where I might find the white mortar?
March 24, 2017 @ 8:12 pm
Yes! Check in the tile section of Lowes or HD. They should have the white or other colors and the technique should be the same. Hope that helps you!
December 23, 2021 @ 11:51 am
Love love love the job your brother did. Before we go ahead with exterior German schmear, should we touch up the holes in existing mortar?
March 29, 2017 @ 5:39 pm
Hi there from Australia, I’m so in the this mortar/ german smear techniques, I’ve been prowling websites and pinterest and anywhere else to get as much information as possible too. I’m having a little bit of trouble as well sourcing the white mortar here in Australia…also the ongoing maintenance was a concern, all comments and advice so far suggest minimal upkeep…WINNER!!! sounds perfect…loving all the imput from everyone so far and a big thanks to you all…I’m keen to get started…stay tuned and thanks again Belinda
March 29, 2017 @ 5:44 pm
Great! So glad this was a help to you. Hope you can find that mortar!
May 1, 2017 @ 2:03 pm
I am a single senior citizen. Do you know of a contractor who will do a brink smear for me. I live in Wood Co., TX.
May 7, 2017 @ 5:14 pm
I wish I could help you, but I’m not near & have no connections there. Good luck with your search!
May 7, 2017 @ 8:19 am
Any colour suggestion for doing the bricks on a home with terracotta coloured tile roof? I love the schmear look but just can’t work out what would go with the tile, and I can’t afford to replace the tile.
May 7, 2017 @ 5:13 pm
I think the light gray or cream colored mortar would be great! Especially with a darker gray accent color. I would suggest searching for homes with terra-cotta roofs on Pinterest & see what comes up that you like! Good luck!
July 9, 2017 @ 9:53 pm
I have native stone on my home, I hate it! Do you think a German smear would work just as well as brick?
July 10, 2017 @ 7:21 am
Hmmm– I really don’t know! I’m not familiar with native stone done with this process. Sorry I wish I could be more help!
August 17, 2017 @ 11:33 pm
Just painted the bricks on the fireplace. They were a nasty yellow, painted them three reds with some black. Waited a day to completely dry, then did the white mortar. Like with original brick, spray with water first then adhere the mortar. Used a ziplock with corner snipped off like you were cake decorating to get in the original grout lines, worked like a champ! Used a trowel to take off the main bulk then for the next two days, used burlap to wipe off to expose more color. Walk by, wipe a little, walk away. Rinse and repeat. It turned out awesome!!!
August 18, 2017 @ 6:39 am
Great! Thanks for the tips!! I’m sure it’s beautiful!
August 28, 2017 @ 7:46 am
Fran, can you show or email me a picture of your finished project? thank you, Rachel
August 27, 2017 @ 6:24 am
I have light brick – can you do the German smear technique ? Tint the mortar? Need ideas on how to change the color.
August 28, 2017 @ 8:07 am
Yes, this can be done on lighter bricks. You can add dye to mortar to change the color. I would recommend finding a brick distributor that sells the dye & checking out some samples of finishes. Good luck!
November 29, 2020 @ 5:29 pm
Can you do a thinner consistency to do on brick floors? If so, how would it hold up to foot traffic (both human and dog) and also washing it?
November 30, 2020 @ 6:29 am
I’m really not sure about that! Haven’t tried floors yet.
July 5, 2022 @ 1:10 pm
I have read several other blogs that you should Type S mortar because you don’t have to seal it, so I’m wondering how yours is holding up with a different product since it’s been a few years now.
July 5, 2022 @ 3:13 pm
Still holding up perfectly since the first day! No problems at all. Hope that helps!