Tree Branch Curtain Rod
First of all, thanks so much for all the nice things so many of you have said about Lily’s room since I posted about the reveal the other day. I’m so glad you liked it. She is really enjoying her new space & all the attention it has gotten.
This week, I’ll be sharing some of the details and tutorials of some of the things in the room, as well as try to answer some of the questions I’ve been receiving.
It seems one of the favorites of the room is the tree branch curtain rod, so I’m sharing some tips on how to do that today.
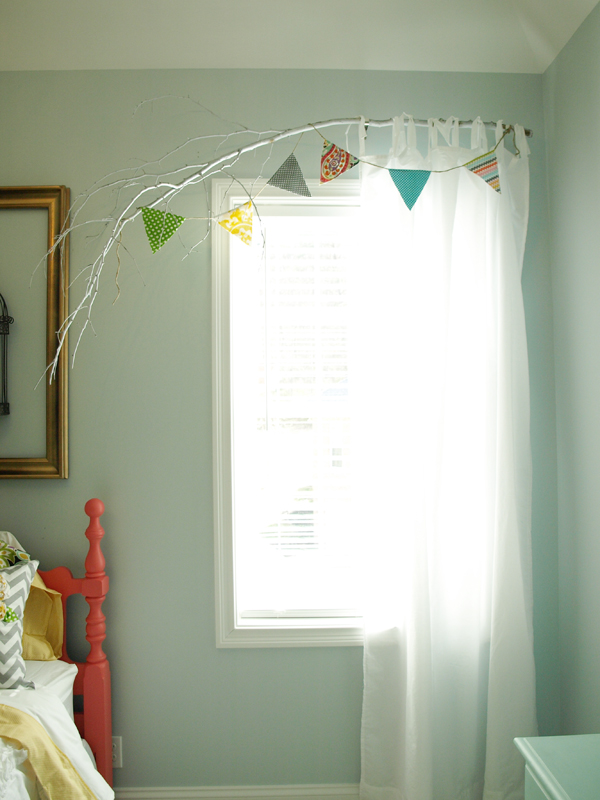
This could possibly be one of the funnest & cheapest ways to treat a window known to man. If you have a window that needs to be treated, you may want to give this a try.
Obviously, the first thing you will need is a branch, but I’m guessing you already knew that. Choose one that is not too heavy, but also not too flimsy. Mine turned out to be just the right size with a diameter of about 1.5 inches. Don’t worry if the branch is too long, only that it’s not too short. Of course you will measure the width of your window to determine how long it needs to be. For Lily’s window, I wanted the branch to extend well beyond the actual window, so keep your measurement in mind when choosing a branch.
Here’s the one I used from our yard.

I chose it because it was nice & branchy. My husband claimed he didn’t know what I meant because all branches are branchy, but I know you all know exactly what I mean, right?
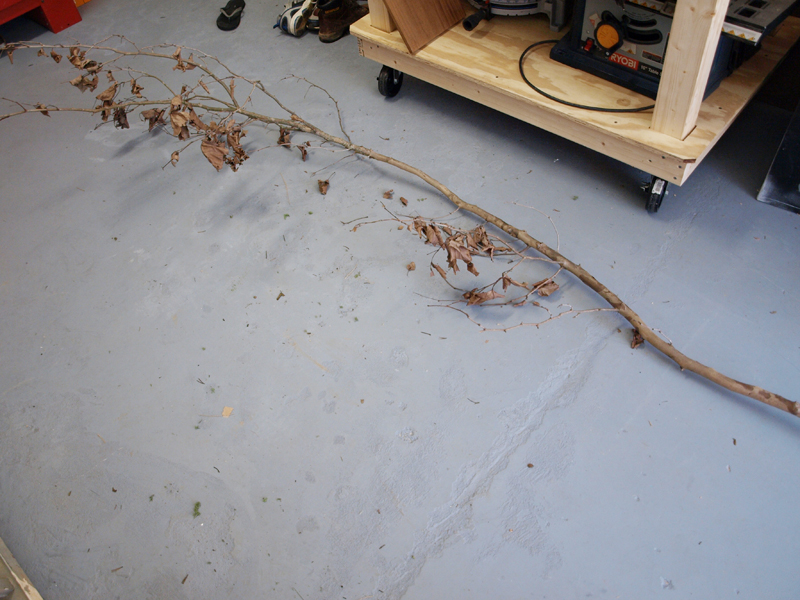
Next, I recommend lying the branch out on the floor to see if it will lie relatively flat. You want to be sure the branch is not bent too much so it will be somewhat flush to the wall. You may need to snip off extra twigs from the “wall side” of the branch if needed to help make it work. Also, anticipate how the curtain will hang & snip any other small twigs that might get in the way. Remove leaves if there are any.


Before painting, consider whether you want a semi-natural look for your branch, or if you want your paint to be thorough in coverage for a little more mod look. Here’s an example of what I would call the thorough coverage. (I’m sorry I don’t have a source for this. I just found it on Pinterest without a source. If anyone knows the source, let me know. Isn’t it cute, though?)

Notice how the paint thoroughly covers everything. For my branch, I wanted it slightly more natural white birch look, with a little bit of bark color showing through. I’ve painted several branches before & learned this sort-of by accident. But, if you want the natural look, don’t bother with sanding or picking off the loose bark pieces off of the branch before painting. (If you want the full-coverage look, do pick off any loose bark & sand down rough spots.)


To hang the branch, we used basic curtain rod brackets from Home Depot & they happened to fit perfectly. (You may decide to choose your brackets first, & then choose a branch that will fit it.) You can also sand down or notch the branch a little bit at the point where it fits into the bracket if needed.


Since our branch angled downward & wasn’t perfectly parallel to the window frame, we used a bracket on the right & in the center & just let the branch angle down on the left.

That’s really all there is to it! I prefer the look of a basic lightweight & airy curtain with a branch rod. Tie-tab curtains are the best for a branch rod because you can adjust the length of the panel by tying the ties shorter or longer if the branch is not perfectly straight. Coming up, I’ll tell you how to make a simple tie-tab curtain for super-cheap. More on how to make the basic bunting as well, so stay tuned! Send me your questions if you have them & I’ll do my best to answer!


March 5, 2012 @ 2:08 pm
A really, really cute idea, Julie. It turned out just great- xo Diana
March 5, 2012 @ 5:22 pm
That is just simply amazing. I LOVE it so much.
March 5, 2012 @ 6:22 pm
Total Genius. Love it!
March 5, 2012 @ 9:45 pm
Aimie here from the blog http://www.BloomingSophia.com. Love the room you created for your daughter, it's precious! Very inspirational to me:)
March 5, 2012 @ 11:50 pm
so lovely.
c xxx
March 6, 2012 @ 12:56 am
What a cool idea! I love how it looks with the pennants.
March 6, 2012 @ 4:54 am
I love it! I really love the idea of using branches as curtain rods, and what better place to do it than a little girl's room! By the way, I'm a new follower from http://sixthstreetsunshine.blogspot.com. Would love it if you would stop by!
March 6, 2012 @ 12:50 pm
Now I have to say that is very creative would have never thought to use a branch love the way it looks pinning it for sure!!!
March 6, 2012 @ 1:50 pm
Julie I am bookmarking just about everything on your blog and I'm so glad I found it now as I'm moving to a new place month end. Quite fortuitous.
March 8, 2012 @ 12:24 am
I fully understand what branchy means.The room is lovely and want to copy your branch idea for our grandchildren/guest rooms. Thank you for telling us about the painting of it and if we want full coverage.
March 8, 2012 @ 4:31 am
I'm a new follower and so excited. Your blog is too cute! Can't wait to read more!!
March 15, 2012 @ 3:28 am
Wow this is very creative, I wonder if the branch is strong enough to handle the curtain.
dovetail jig
March 12, 2021 @ 8:51 am
I like this article this is helpful information you provide in your articles.
April 13, 2021 @ 10:32 am
Woah, you have created a masterpiece using a dead tree branch. Thanks for sharing this creative post with us.
June 30, 2021 @ 10:47 am
I love it! Good work and quit different from others
September 21, 2021 @ 7:18 am
This is very creative, Love it so much. Love the room you created for your daughter.
September 22, 2021 @ 4:07 am
It’s beautiful room, I love it.
December 18, 2021 @ 7:27 am
Very nice
January 15, 2022 @ 2:09 am
Very Nice i love it
February 16, 2023 @ 1:15 am
Awesome post. Really looking forward to read more. Keep writing.